
How To Setup A Site To Site VPN Connection with Strongswan
OVERVIEW
OVERVIEW
This post highlights the key steps involved in setting up a site to site VPN connection.
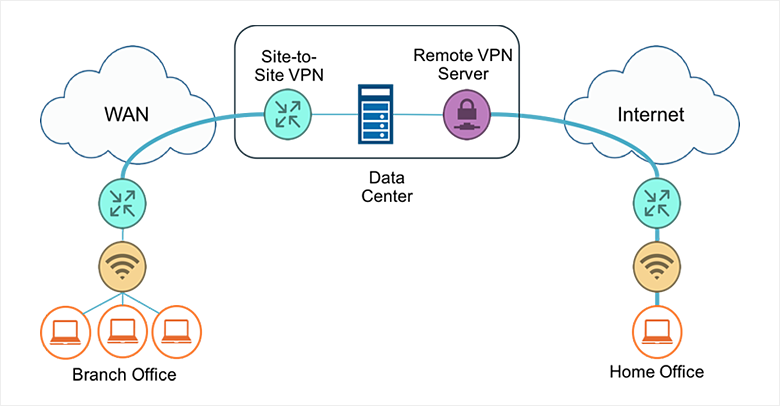
A Site-to-site VPN is a type of VPN connection that is created between two separate locations. It provides the ability to connect geographically separate locations. for example a linux server hosted somewhere on amazon cloud can be connected to a local computer behind a virtual private network in a remote office in Brazil.
SCOPE
This posts covers the process for setting up a site to site vpn between two linux servers running centos 7. i.e. we will assume that both servers that need to be connected are running linux centos 7 operating system.
PREREQUISITE
In order to configure a site to site VPN, you will need to have the following:
- The public and private IP address, gateway, and CIDR netmask for the Virtual Server
- The public and private IP address of the remote router that your VPN will be connecting to. You will need to contact the owners/admins of the remote site for this information.
- The “shared-secret” password that both ends of the connection have to use for authentication.
- The values for ike-group and esp-group. You will need to contact the owners/admins of the remote site for this information.
SCENARIO
In this guide, we assume the below setup.
A — is a Linux Virtual Server and
B — is another branch remote office Server.
The below sample values will be used in the guide.
A has External/Public IP Address as 1.1.1.1 , Local Lan Subnet 192.168.100.0/24
B has External/Public IP Address as 2.2.2.2, Local Lan Subnet 10.1.1.0/24
Our goal is to successfully setup a connection from Server A to Server B,
To accomplish the task, we will use Strongswan vpn for the connection.
Below is a sample diagram of the network topography:
(192.168.100.0/24) Server A 1.1.1.1< — — — Internet — — — — -> 2.2.2.2 Server B (10.1.1.0/24)
WORTHY OF NOTE (Newer Strongswan Versions)
Depending on the version of strongswan you install, the ipsec.conf and ipsec.secrets configuration files could be located at /etc/strongswan/ directory.
Also, Use strongswan while checking ipsec tunnel status or bringing up the tunnel e.g. #sudo strongswan statusall instead of sudo ipsec statusall
STEP 1: Install the VPN Tool
On server A, run the following command to install strongswan
Linux:
# yum install strongswan -y
STEP 2: Configure the VPN Tool
# cat >> /etc/sysctl.conf << EOF
net.ipv4.ip_forward = 1
net.ipv4.conf.all.accept_redirects = 0
net.ipv4.conf.all.send_redirects = 0
EOF
The above command sets up ip forwarding and redirects for the tunnel.
Before adding new configuration files, we will backup the existing ones.
STEP 3: Backup Ipsec.conf and Ipsec.secrets for previous connections
In order to avoid making modifications directly to the ipsec.conf and ipsec.secrets file and risking the possibility of breaking previously set up connections, make a backup of both files.
The ipsec.conf file contains all peer to peer connection profiles for ipsec while the ipsec.secrets contains the secret pre shared key for the connection.
>> Still on server A, use below commands to backup the configuration files
Linux:
# cp /etc/ipsec.conf /etc/ipsec.conf.bkup
# cp /etc/ipsec.secrets /etc/ipsec.secrets.bkup
STEP 4: Create Connection Profile(s) for new connection
To keep things neat and not clutter our ipsec.conf file, we will create a new connection profile in a seperate file and include them in the master ipsec.conf file.
- Create a new configuration file in the /etc directory of server A called ‘A.conf’ with the following configurations.
To create the file, use the below command.
# touch /etc/A.conf
Next, open the file in nano, vim or whichever editor you use.
In nano, use:
# nano /etc/A.conf
I have used the comment character ‘#’ to indicate what each lines of the configuration means.
conn A-B #connection name.
authby=secret #this specifies how the connection is authenticated
auto=start #start the connection by default
type=tunnel #the type of connection
left=1.1.1.1 #This is the public ip address of server A
leftsubnet=192.168.100.0/24 #This is the subnet/private ip of server A
right=2.2.2.2 #This is the public ip address of server B/remote server
rightsubnet=10.1.1.0/24 #This is the subnet/private ip of server B
ike=aes256-sha1;modp2048 #Internet key exchange, type of encryption keyexchange=ikev2 #Internet key exchange version
ikelifetime=28800s #Time before re authentication of keys
esp=aes256-sha1-modp1536 #Encapsulation security suite of protocols
Next we create the secrets file.
- Create a new configuration file in the /etc directory of server A called ‘A.secrets with the following configurations. We will assume a key for the connection. In the real case, this key will be agreed on by both parties for the connection.
To create the file, use the below command.
# touch /etc/A.secrets
Next, open the file in nano, vim or whichever editor you use.
in nano, use:
# nano /etc/A.secrets
We will assume our pre-shared key is ‘AAABBCCDD’
Type in the line below in the A.secrets file
1.1.1.1 2.2.2.2 : PSK ‘AAABBCCDD’
The format is <source-ip> <destination-ip>:PSK <preshared key>
The above tells ipsec to use the key specified above for connections between Server A(1.1.1.1) and Server B (2.2.2.2)
Next we will include these configuration files into the master ipsec.conf and ipsec.secrets file
- Add the below line to the ipsec.conf file
# include /etc/A.conf
- Add the below line to the ipsec.secrets file
# include /etc/A.secrets
STEP 5: Add Static Routes
In order to reach the remote lan, we will configure static routes via the tunnel to the remote lan.
[root@Server-A]# route add -net 10.1.1.0/24 gw 1.1.1.1
The above command routes traffic for server B (10.1.1.0) via our public IP (1.1.1.1). i.e. the VPN Gateway of server A.
Finally, restart ipsec strongswan to update the new configurations.
# sudo ipsec restart
On newer versions of strongswan, you may need to use ‘strongswan’ instead of ‘ipsec’
This concludes our configuration for server A, the process for server B is the same as above with a few modifications as listed below.
All left and leftsubnet settings in the ipsec.conf file of server A become the right and rightsubnet settings in the ipsec.conf file of server B. Likewise the secrets file and ipv4 tunnel settings
Now we can proceed to establish a connection.
STEP 6: Establish The Connection
After setting up Server B, we bring up the tunnel connection with the below command. E.g. from Server A,
# sudo ipsec up A-B # where A-B is the connection name
You can check the status of the connection with the following commands
# sudo ipsec statusall
# sudo ipsec status
To restart ipsec , use:
# sudo ipsec restart
Thank you for reading. Kindly leave any question or comments below and i will be happy to address them.