
How to Setup a Complete Development Environment in the Cloud using Google Cloud Shell & VSCode
OVERVIEW
OVERVIEW
In this post, i highlight in detail how to set up your own development environment in the cloud using Google Cloud Shell and the overwhelming benefits of doing so.
With constant improvements in technology, computing power continues to grow at a geometric progression. According to the famous Moore’s law, computing power will double every 2 years while the cost of computers will continue to reduce. This is very true. However, despite this, the costs of obtaining a highly efficient computer system suitable for the disk and memory-hungry applications we run today is still far fetched :(
But here's the good news. You don’t always need a 16–32gb ram or a 256–1tb hardware device to run even the most complex development environments anymore.
Cloud providers have risen to the challenge and there are a few today that provide this computing power at your fingertips, made accessible from any browser anywhere in the world. You can call this mobile non-blocking development if you will :)
This post walks you through the steps I take to set up a cloud development environment using Google Cloud Shell which has proven to be one of the best cloud providers out there I’ve found to run your cloud development environment.
Why You Need A Cloud Development Environment
- System Resources (CPU, Memory, Storage): This is the most obvious one. If you are constantly maxing out that old CPU you got, then you don’t have to anymore. Channel all those wasted time into productive hours by running a cloud environment.
- Access from Anywhere: With a cloud development environment, you can access cloud resources from any browser on any computer with an internet connection.
- Security: A cloud environment provides you a secure terminal to connect to your resources and codebase. Less worry about the security provided out of the box.
Components of the Setup
- Google Cloud Shell
- VS Code Setup (with extensions :)
- Dev tools (git, nodejs, ruby, docker, Kubernetes, MySQL, etc ) are configured by default and ready to go.
Assumptions
- You have a GCP Account with access to the GCP console. If you do not have this, please click on this link below to set up one before proceeding: https://cloud.google.com/resource-manager/docs/creating-managing-projects?
How to set up your Environment
Start and Boost Cloud Shell
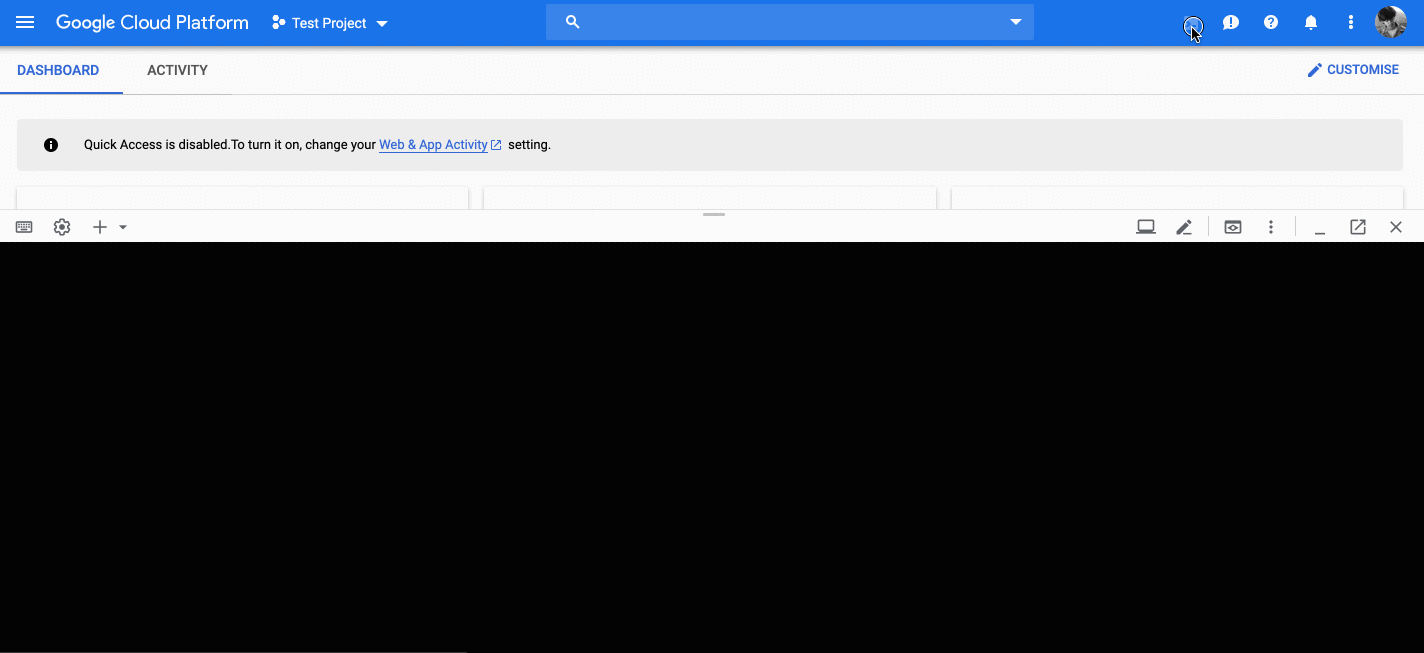
- Visit https://console.cloud.google.com/ and click on click on the Cloud Shell button to launch your cloud shell (image below)
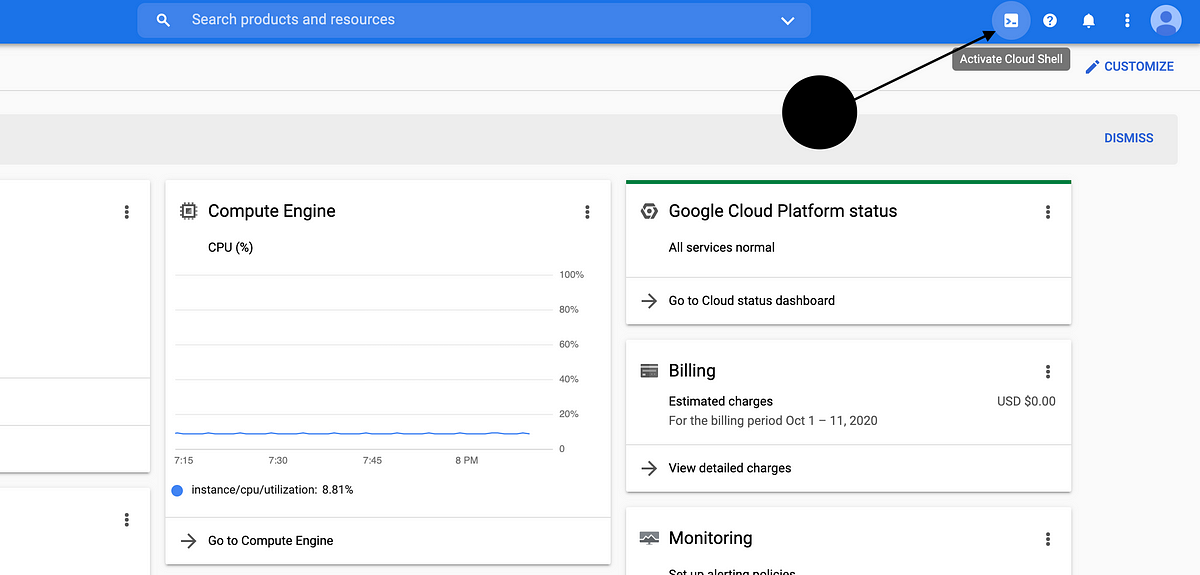
- Boost Cloud Shell: Enabling boost mode on your cloud shell makes it faster. If you get a confirmation screen, read the terms and accept(image below)

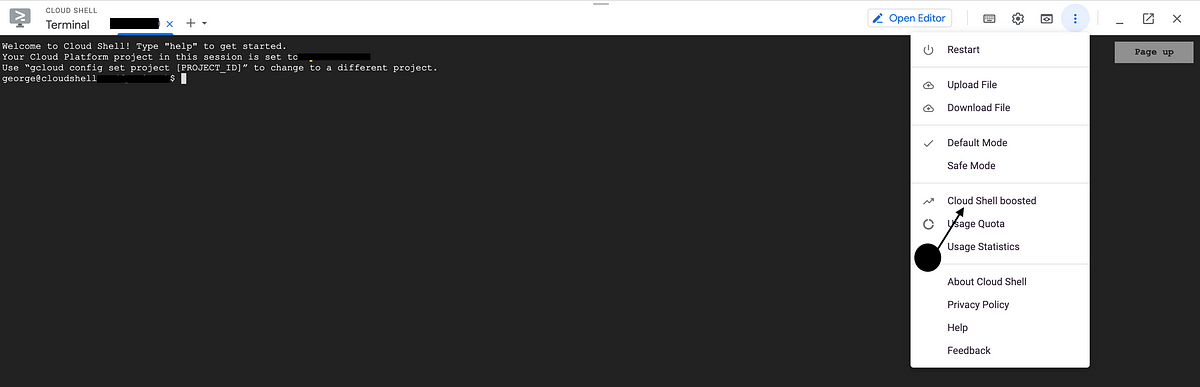
- Cloud shell Boosted: Confirm your shell is boosted
Yay! now we have more terminal power. Let's proceed.
Install VS Code Server
VS Code Server allows you to run vs code from any machine and access it from a browser. (https://github.com/cdr/code-server/)
Run the following set of commands in your terminal to setup and install VS Code.
- Below, we get the latest VS Code server version and store in an Env variable
VERSIONexport VERSION=`curl -s https://api.github.com/repos/cdr/code-server/releases/latest | grep -oP '"tag_name": "\K(.*)(?=")'` - Next, use
wgetto download the latest version of the code server to your cloud shellwget https://github.com/cdr/code-server/releases/download/$VERSION/code-server-$VERSION-linux-x86_64.tar.gz - Extract contents of the downloaded archivetar -xvzf code-server-$VERSION-linux-x86_64.tar.gz
- Rename extracted folder for easier access.mv code-server-$VERSION-linux-x86_64 vscode
- Starting VS Code (Paste one line below at a time to your terminal)cd vscode./code-server --auth none --port 8080
Note that we use --auth none above to indicate we don’t need additional authentication to vs code as we are already in a secure cloud shell environment.
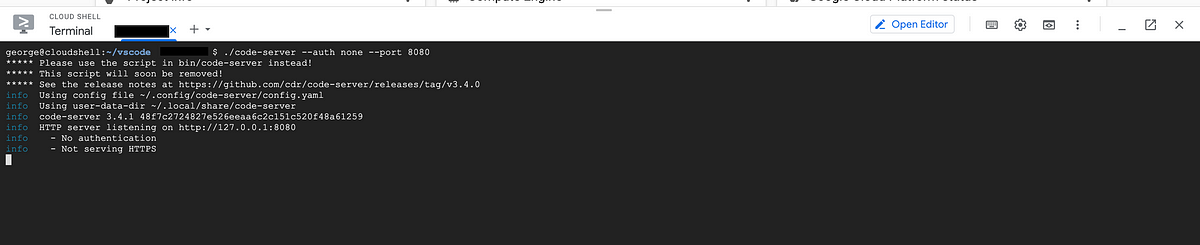
- Previewing in the browser
This should open a new browser tab with VS Code running.
Way to go! you just successfully setup VS Code on the cloud.
Running a sample Node+Vue app
Google Cloud shell comes pre-configured with most of the tools you need to work day-to-day. However, you have the flexibility of installing additional tools to meet your requirement. Below we will clone a Node+Vue app repository from GitHub and run it on cloud shell.
Note: we wouldn’t need any library installations as Cloud shell already has git and npm installed for us.
- Add a new tab on Cloud shell by clicking on the (+) button

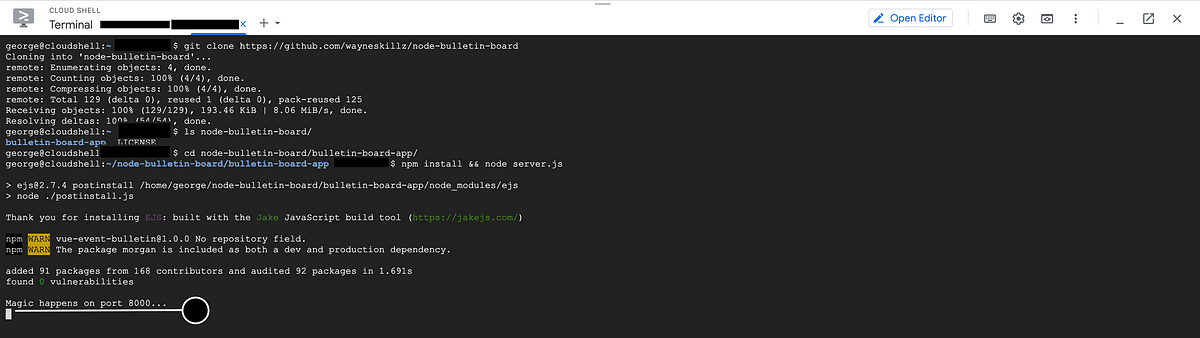
- Clone Node Bulletin Board app repo in the new tabgit clone https://github.com/wayneskillz/node-bulletin-board.git
- Moving into the cloned directorycd node-bulletin-board/bulletin-board-app/
- Run
npm installand start the appnpm install && node server.js
This will install dependencies and start the app on port 8000.
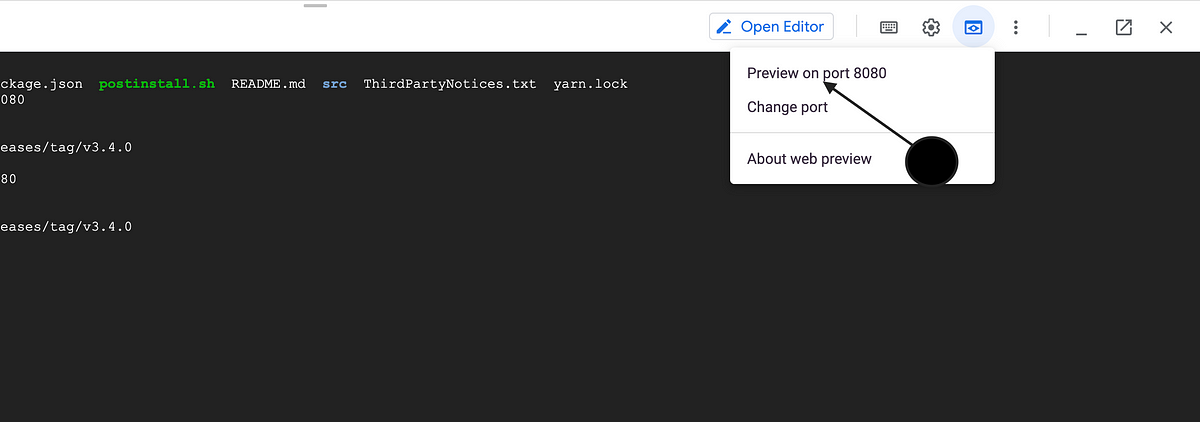
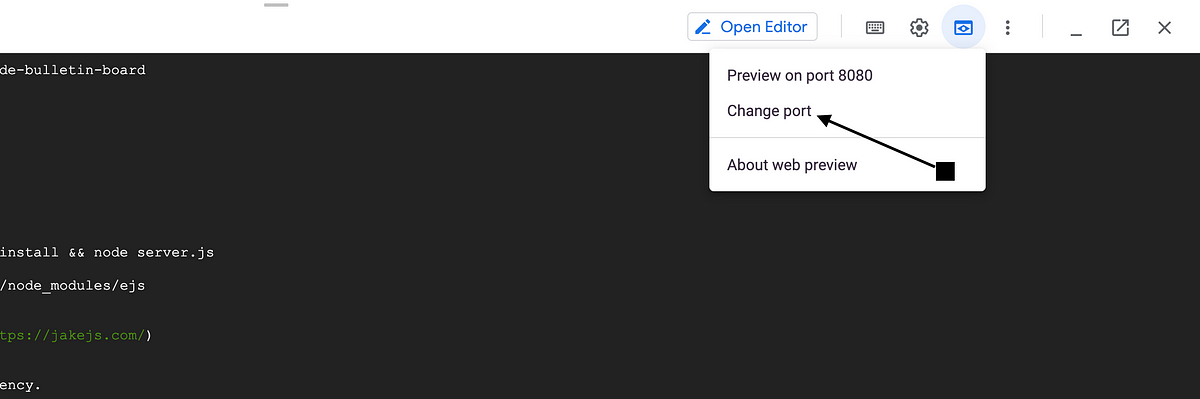
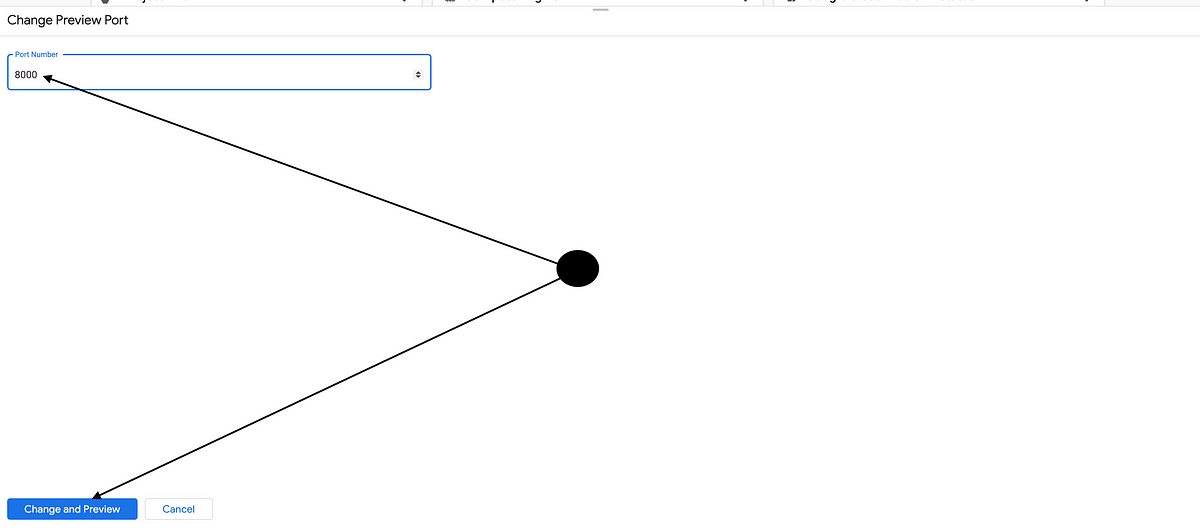
- Previewing the app on Cloud shell: Change port and preview
The Cloud build menu by default only allows you to click on one port at a time but other ports are also available. Just change the port number and preview (see below)
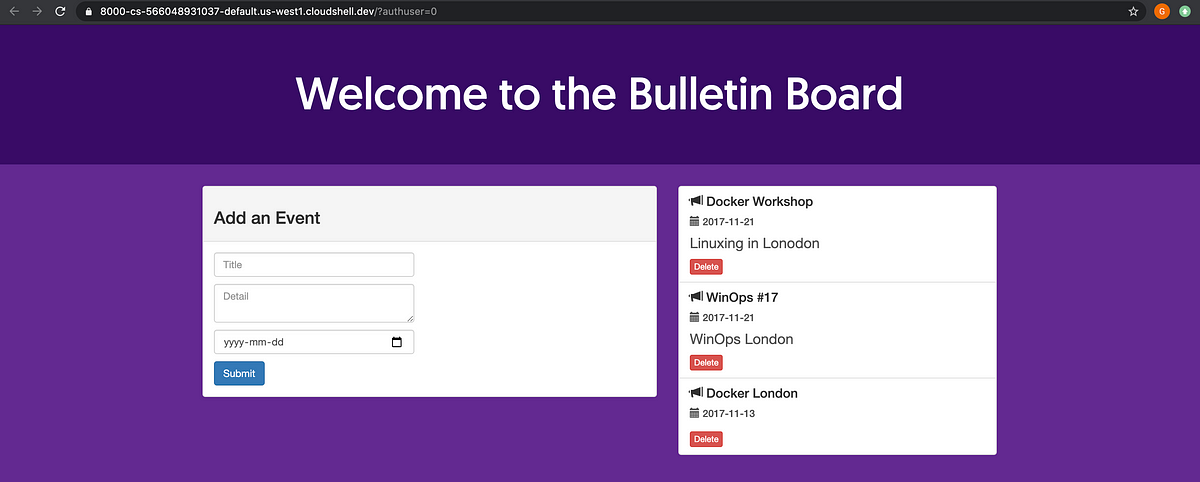
Your app should open in a new browser tab as shown above.
If you got to this point, Congratulations! You have successfully set up and run a cloud development environment accessible for you at all times and from anywhere.
Final Notes on continuous use:
- Cloud shell gives you 50+ hours of usage per region weekly. This quota resets at the start of each new week. For sustained use, always close the cloud shell sessions when not in use.
- Cloud shell gives you 5GB of persistent storage. This persistent storage is mapped to your home directory on the shell. Therefore you can safely close the Cloud shell and return at a later time with the confidence that your files are intact
- Use a git versioning system to manage your code. Whatever works for you (Github, bitbucket, or google cloud source repository).
Till next time…
HCC! — Happy Cloud Coding!