
Docker For Beginners: How to build your first container
A beginner's guide to understanding what Docker is and what it is not.
A beginner's guide to understanding what Docker is and what it is not.
What is this Docker?
The word “Docker” is something you may have heard in a technology discussion, book or even a blog somewhere. But what does it really mean you may ask. By the end of this post, My goal is that you have a solid understanding of what Docker is and can flow with the discussion when next you hear it.
To begin with, Docker is an open-source tool that makes building, running and sharing containerized applications easier. But one may ask “What then is a containerized application? “ read on.
A containerized application is an application fully bundled with its architecture, frameworks, interfaces, and tools needed for it to run on any operating system shipped together as one package. Yes, a single package
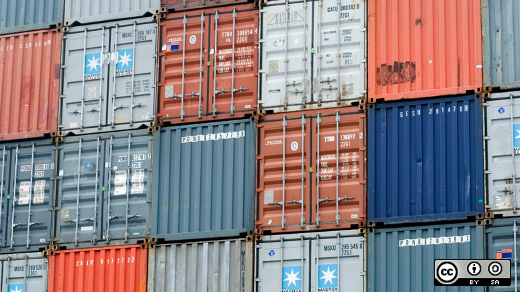
Looking at the image of the shipping containers above, it is immediately obvious that the contents of each container is irrespective of its location in the stack. More on this further down.
Docker solves the “it works on my machine problem”. Most developers are familiar with this problem.
It is a situation whereby you build a software, test it locally on your machine, and everything works perfectly, you then decide to deploy this application to a server somewhere and make it accessible to the world. You proceed to deploy, only to be hit with a lot of unseen issues. Your perfect little application running locally is now far from perfect in a production environment. But what happened?
This is simply because building an application is no longer just writing codes.
For an application to run successfully, it requires the combination of its parent infrastructure, programming languages, system architecture, interfaces, libraries and tools working harmoniously to ensure a successful run of the application.
Docker containers are built to address this challenge by fully isolating the workings of an application from its environment, thereby ensuring that the dependencies for an application to run are always present irrespective of when or where it is run. (Just like the shipping containers captioned above. The content of each container is irrespective of where it is placed in the stack).
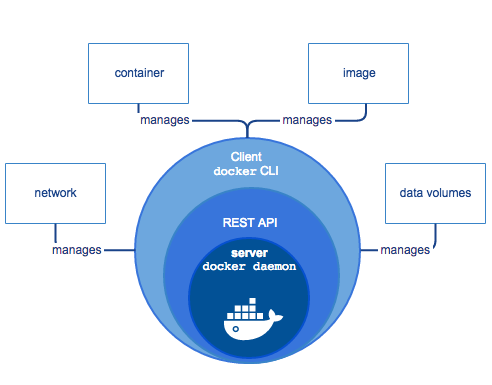
Docker containers make use of something called “images” to achieve this.
What is a Docker Image
A Docker Image is a file consisting of several layers of functionality built-in required to execute code in a container.
Images are immutable. i.e once you build an image with a particular set of configuration and software once, it doesn’t change. You can either delete it and build a new one but not update it.
An example of an image in Docker will be nginx, PostgreSQL, MySQL, etc. They are a complete set of software configuration required to run an instance of itself on a container.
Images embody software packages that are needed as a base to run containers. In other words, images are the foundation for running containers.
From our shipping containers image above, we can say each container embeds within it an image first before anything else.
Difference Between a Virtual Machine and a Container
From the above explanation of a container, if you have worked with virtual machines before, you may be tempted to compare both. However, they are not. Below we will see a clear indication of their differences
While containers behave more like virtual machines, unlike virtual machines, containers do not need to replicate an entire operating system. Only the components they need to operate.
Containers leverage on the base operating system kernel for its required resources. This enables it to be much faster in performance while maintaining a small footprint as opposed to a virtual machine (VM).
Installing Docker
Irrespective of whether you are running on Windows, Linux or OSX operating system, Docker has a distro for you.
Visit the official Docker getting started guide below to install for your operating system and continue reading once you are sure that Docker is installed on your machine.
Go here: https://www.docker.com/get-started
Once you have Docker installed, type the following command in your terminal or command prompt to confirm Docker is running on your machine.
>> docker info
>> docker — version
If you see information about your Docker version pop up in your terminal window or cmd, then you can proceed. Congratulations on getting Docker installed.
Creating your first Docker Container
Once you have Docker installed, we will create our first Docker container with a single line of command. Type the following in your terminal or cmd.
>> docker container run -d — name my-nginx-server -p 80:80 nginx
Worried about what the above command is doing? Don't be. See below.
The above command will perform the below steps in order to start up your first container.
- Docker downloads the official nginx image from a central docker image repository (DockerHub) assuming you do not have this image downloaded locally already on your system (we will look more at images in a later post). But, what is DockerHub?
Dockerhub is an online repository for Docker images just like GitHub is a repository for code.
Next,
2. The ‘ — name’ part of the command attaches the alias ‘my-nginx-server’ to the new container about to be created.
3. The ‘ — d’ part of the command tells the container to run in detached mode (i.e. in the background and therefore makes your terminal available to you once the command completes.
4. The ‘-p’ tells Docker to map port 80 on your host computer to the port 80 listening on the container. nginx image will run by default on port 80 of the container.
5. The final ‘nginx’ is the name of the image to be downloaded from Docker hub. Just like codes have repository names on github, Dockerhub has repository names for images which is by default the image name.
Now, once the above command completes executing, Open your web browser and visit localhost:80 and you should see the default nginx welcome page.
Congratulations! if you got this far, you have just created your first Docker container by pulling an nginx image from Docker hub.
Magic? Not really. In subsequent posts, we will go over how this is possible. We will also go over what Volumes, Networks mean in Docker and how you can possibly publish our own personal image to the Docker hub just like the nginx we just pulled.
Stay tuned.
Please leave a comment if you have any questions or contribution and i will be glad to answer them.